Painted Clues: Reading Runway Markings Like a Pro Before You Touch Down Anywhere
There's a certain kind of confidence that comes with sliding into an unfamiliar pattern and knowing — really knowing — what you're looking at when the runway comes into view. For a lot of sport pilots, that confidence takes a while to build. And honestly, one of the fastest ways to get there is to stop treating runway markings as background scenery and start reading them the way they were meant to be read.
Think of it this way: every stripe, number, and colored bar on a runway is a message. Some of those messages are subtle. Some are pretty urgent. All of them are worth understanding before you're on short final trying to figure out where the threshold actually starts.
Let's break it down.
The Numbers Aren't Random
That big two-digit number painted at the approach end of every paved runway? It's not an address or a serial number — it's your magnetic heading, rounded to the nearest ten degrees and then divided by ten. So Runway 27 points you roughly westward, toward a magnetic heading of 270 degrees. Runway 09 sends you east.
Why does this matter to you as a sport pilot? Because when you're arriving at an unfamiliar field and the CTAF traffic is calling out "left downwind Runway 18," you should immediately know you're looking at a runway pointing south. That quick mental math keeps you oriented, especially at busy uncontrolled fields where nobody's handing you a map.
Runways also come in pairs — the opposite end of Runway 27 is Runway 09, always differing by 18 (or 180 degrees of heading). If you ever land in the wrong direction on a runway, the number painted in front of you will make that very clear, very fast.
Threshold Markings: Where the Usable Runway Actually Begins
This is where a lot of newer sport pilots get fuzzy, and it matters more than people realize.
The threshold is the official beginning of the landing portion of a runway. On a standard paved strip, you'll see a row of thick white stripes running perpendicular to the centerline — those are threshold bars. Count them: the number of stripes actually correlates to runway width, giving you a subtle size reference even before you flare.
Now here's where it gets interesting. Sometimes that threshold isn't at the very beginning of the pavement. A displaced threshold — marked with white arrows pointing toward the actual threshold, followed by a solid white line — means the pavement before that line exists, but it's not for landing. You can use it for taxi and takeoff roll, but you're not supposed to touch down there. Reasons vary: obstacles on the approach path, pavement in questionable condition, noise abatement agreements with nearby residents. Whatever the reason, those arrows are telling you to float a little longer.
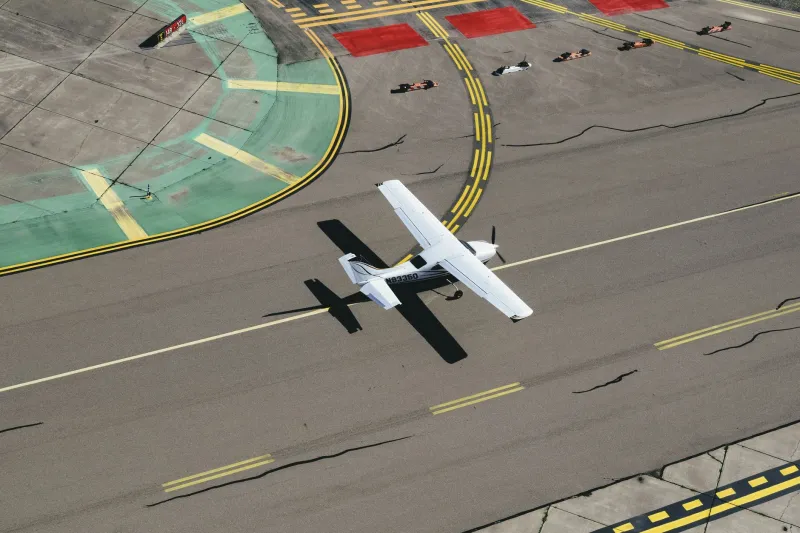
Even more restrictive is a blast pad or stopway, sometimes called a "chevron" area — those big yellow Xs painted on pavement that extends beyond the runway end. That surface is not for any aircraft operations. Don't taxi on it, don't land on it, don't roll out onto it if you can help it. It's there for show — specifically, to show you where the usable surface ends.
Centerline, Touchdown Zone, and the Aiming Point
Once you're past the threshold, the centerline stripe does exactly what it sounds like — keeps you honest on your rollout and approach path. Simple enough.
But look a little further down the runway from the threshold and you'll spot two things worth knowing. The aiming point markings are those two large rectangular stripes sitting symmetrically on either side of the centerline, typically around 1,000 feet from the threshold on longer runways. These are your visual target on final approach. You're not landing on them — you're aiming at them, letting your aircraft settle just beyond.
The touchdown zone markings are the series of smaller rectangular bars that continue down the runway in pairs. They give you a sense of distance remaining and confirm that you're landing in the intended zone. On instrument runways, these are especially critical, but even as a VFR sport pilot flying into a towered airport or a larger public-use strip, understanding what those marks represent helps you judge your energy and rollout.
Grass, Turf, and the Unmarked World
Here's the thing about sport aviation: a huge percentage of us aren't always landing on nicely painted pavement. Grass strips, turf fields, backcountry dirt runways — these are the soul of recreational flying in America, and most of them don't have a single painted stripe.
At these strips, the "markings" become more informal but no less important. Wind cones (or homemade windsocks) tell you the active runway. Mowed versus unmowed grass can indicate the preferred landing surface. Tire tracks in soft turf show you where other pilots have been landing — and sometimes where they've been getting stuck. White-painted rocks or wooden boards can mark the threshold at primitive strips. A row of orange cones might indicate an obstacle or a soft section to avoid.
When you're planning a visit to a grass strip — especially one you've never flown into — do your homework through resources like the Airport/Facility Directory (now called the Chart Supplement), ForeFlight, or pilot reports from folks who've been there recently. The Sport Aviation Village airfield guide community is a solid place to find that kind of real-world intel from pilots who've actually walked the turf.
Surface Condition Clues You Can See From the Air
Markings aren't just painted symbols — the condition of the runway surface itself communicates something. Faded markings might indicate an older, less-maintained strip. Patchy pavement or visible cracking can signal roughness that matters for light sport aircraft with small wheels. Standing water glinting in the sun is a braking-action warning. Tire rubber buildup near the touchdown zone tells you where other pilots have been landing consistently, which can be useful information.
None of this replaces a proper NOTAM check or a call to the local FBO, but developing the habit of reading the surface as you fly the pattern is a skill that pays off over a lifetime of flying.
A Quick Pre-Landing Mental Checklist
Before you turn final at any unfamiliar field, run through this quick visual scan:
- What's the runway number? Does it match your expected heading?
- Where's the threshold? Is it displaced? Are there arrows telling you to float further?
- Any chevrons or Xs? Know where the usable surface ends.
- Can you spot the aiming point? Use it.
- What's the surface telling you? Wet, rough, narrow, soft?
Fifteen seconds of attention at the right moment can prevent a whole lot of confusion on rollout.
The More You Look, the More You See
Runway markings are one of those things that fade into the background until you actually study them — and then you can't stop noticing them. Once you understand what each element is communicating, landing at a new strip feels less like guesswork and more like reading a familiar map.
That's really what sport aviation is about, isn't it? Building the kind of knowledge that makes the sky feel like home, no matter where you land. Next time you're in the pattern, take an extra look at the pavement below. It's been talking to you all along.